9.06.2013

Back Again

Here I am in the hospital...

Sorry to disappoint....I haven't posted for awhile because I have been ill. Actually I have ovarian cancer. Cancer now strikes 1 in 2 men, and 1 in 2.6 women - that's outrageous! Of course, I have no health insurance, so my brother has organized a fundraiser to help pay for medical costs. If you feel inspired to give, there is a Give Now button on the right. All donations will be GREATLY appreciated! 

Also Folks, remember to take care of your health, and most importantly your immune system whose job it is to protect us. Keep the stress down, get outside in fresh air and sunshine, and cultivate love, laughter and joy. I have been very careful, but I guess I'll have to make more changes. I'll be posting about my time at the hospital, so stay tuned!

5.18.2013

Glorious Peonies


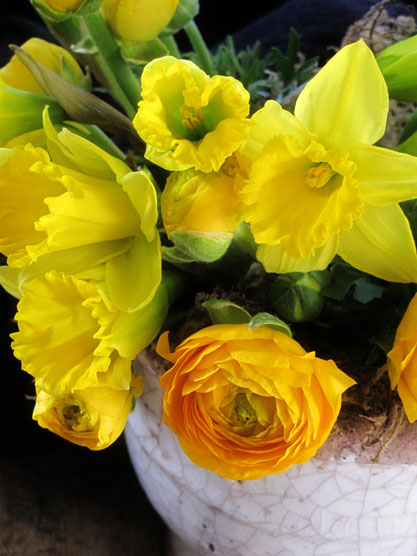
Peonies are in the markets now, my favorite flower...
.....isn't Nature just so Astonishingly Beautiful?

5.08.2013

Crazy Amoeba Stool


Here is my covered stool project that I just finished, do you like it? I found a cute funky little stool at my favorite thrift shop, but the fabric was worn and dirty, and definitely did not fit into my decor scheme. I am a big fan of African Kuba Raffia Textiles, and wanted to use one for this project. I looked for quite awhile on the internet, finally finding one on eBay that I liked very much, but it was not quite the right size. As I was pondering how I could make it work, it was snapped up by someone else - so much for that idea! 

So, I decided to make a cover myself, using a technique I have seen around - fabric appliques. I chose to work on a medium weight black linen, with a dark burgundy raw silk for the design. I decided on using an amoeba-like design as I have a lot of pattern going on in my apartment, and wanted this stool to be different, yet still harmonious.


Foot stool - before. Pretty ugly - huh?

Old fabric cover taken off, with new piece of foam cut to size.
I covered the foam with 2 layers of polyester batting to soften the edges.

Using the embroidery foot, along with lowering the feed dog, I sewed in a free motion around the edges of my cutout shapes. I guided the fabric as best as I could, not being too concerned whether the stitching was super perfect or not.
 

Fraying the edges of the raw silk shapes helps add interest and adds to the hand-crafted look I was after.

I removed the feet from the stool after first numbering them to return them to their proper place afterward. I then stapled on the fabric, being careful to keep the tension even so there were no puckers.
I came across these brass shapes while at the bead store, and decided to use them on the corners for an embellishment. Working with leftover suede leather scraps, I cut strips which I made into fringe tassels.


Binding the tassel to keep it in place.
Detail of the finished fringe tassel accent.

I added a layer of butcher paper to finish off the stool underside, and replaced the feet.
I later decided to gesso the underside black, so that it would look more finished. 
And violĂ  - here is a closeup of my new foot stool. 

I am very happy with how the patterns go together! What do you think?


So now, I'd like to hear from you - what projects are you working on? Let me know in the comments section, thanks!

3.21.2013

An Italian Treat for Spring


Hello All,

Happy Spring!!!  I am so happy to herald the arrival of Spring and the warmth that it brings. And not to mention fresh asparagus! When I lived in Italy, this was a seasonal treat in which I always indulged - fresh asparagus with eggs and Parmesan cheese. Below is the recipe referenced from What's Cooking America which they call Asparagus Milanese:


Asparagus Milanese Recipe - Asparagus with Fried Egg

Yield: 4 servings
Prep time: 15 min
Cook time: 10 min


Ingredients:

2 pounds asparagus, cut into 5- to 6-inch lengths (use the thicker stem ones if possible)*
Freshly grated Parmigiano-Reggiano cheese
4 tablespoons butter
4 eggs
Coarse salt and freshly ground black pepper to taste


Preparation:

Snap off the tough ends of the asparagus; cook in boiling salted water until just crisp-tender, approximately 4 to 5 minutes for thick stalks. Remove from heat and remove asparagus with a slotted spoon; drain on several thicknesses of paper toweling until ready to serve. Remember that the asparagus will continue to cook from their own heat as they stand and cool, so if you like very firm asparagus, time them accordingly.

Divide cooked asparagus among 4 individual serving plates. Sprinkle with grated Parmigiano-Reggiano cheese.

In a medium-size frying pan over medium heat, heat the butter until just hot enough to sizzle a drop of water. Break and slip eggs into the pan; reduce heat to low and cook approximately 2 to 3 minutes or until whites are set but yolks are still runny. With a spatula, remove the eggs to the plates you will serve them on and place on top of the asparagus (be careful not to break the yolks). The eggs should be hot enough to slightly melt the grated parmesan cheese.

If the butter hasn’t already begun to brown, increase the heat under the frying pan and cook butter until lightly browned. Pour the browned butter over the top of the eggs. Season with salt and freshly ground pepper. Serve immediately.

Makes 4 servings.


 ....and here's a closeup of tasty and wonderful asparagus....


 If you know me, by now you know that I always have flowers around...


....now, if you will excuse me as I tuck into one of my favorite Italian Treats!  

Buon Apetito!


What are your special dishes to celebrate Spring? Please share with us in the comments section below....

2.26.2013

Kefir Madness


Delicious Kefir Lemonade


Hi, It's been awhile since I've written.... I strive to post interesting subjects, not junk, so sometimes there may be awhile between posts. Please excuse....

Spring is just around the corner, and it's time for making Kefir Lemonade! I just recently discovered this wonderful and refreshing drink, which is full of healthy probiotics which are good for our digestion. Upon reading the directions, Water Kefir might seem time consuming to make, but once you get the hang of thing, is very easy. As you decant the first batch for the second fermentation, just start the second (and subsequent) batch(es) which will ferment while you are enjoying the previous batch. I am posting the original recipe I used from the "Loving Our Guts" blog, found here: http://www.lovingourguts.com/water-kefir-primary-and-secondary-ferments/ .

I obtained my original water kefir grains from a fellow Weston A. Price Foundation member. The WAPF is an international health organization, http://www.westonaprice.org/ which anyone can join. I find their website to be particularly informative.  The PicklIt Jar featured here, can be found online at: http://www.pickl-it.com/.   

My first attempts at making Water Kefir were not very successful; the fermented liquid made my chin itch (What??!)  When I just covered my fermenting grains with cheesecloth, I guess 'other bacteria' were fermenting with my kefir grains. So back to the internet for more research, which convinced me that it was worth spending the money on the PicklIt jar. Here is the recipe I used:


Water Kefir Recipe Primary Ferment

 from Patty at LovingOurGuts.com


    1.5L Pickl-it jar
    1/2 cup water kefir grains *
    1/4 cup Organic Sugar
    1 tbsp Organic Molasses
    Shell from half an egg that has been well washed or a calcium tablet.
     Filtered water
    A tea towel or other way to protect the pickl-it jar from light.

In a clean 1.5L pickl-it jar put water kefir grains, sugar, molasses, and egg shell or calcium tablet.  Then use filtered water to fill it to the shoulder.  Close the jar and insert the air lock and fill it with water to the fill line.  Wrap the Pickl-it in a towel to protect it from the light and set it aside for the next 1-4 days.

I let it ferment for a week or so, until it is no longer sweet. The liquid has kind of a vinegary, yeasty smell, and is not too interesting at this point. So, I strain out the kefir grains, (discarding the egg shell) and pour the liquid into a bowl, to which I add the juice of 2 lemons, and some honey and stevia. Then I decant this liquid into flip top bottles, which I let ferment in the refrigerator for another week or so. When I think it is ready, I pop open a bottle, and enjoy!


Closeup shot of the Water Kefir Grains which resemble little spongy, cauliflowers. These will multiply over time, in which case, you either throw the excess away, or give them to your friends so that they can make their own Water Kefir Lemonade! 

The grains (with molasses or other sweetener) are left to ferment in the PicklIt Jar on the left. That funny contraption on the top is an escape valve for the gases to escape. After a week or so, depending on how warm your kitchen is, the liquid is decanted into the fliptop bottle on the right for a second fermentation, which helps form the natural carbonation. Add  lemon juice and honey (and stevia) for a refreshing and sparkling beverage.

Always important to have flowers around.....
And violĂ ! There you have it - Water Kefir Lemonade ! A delicious and sparkling beverage that is actually GOOD for you!

In case you are interested in learning more about fermented drinks and the importance of healthy bacteria in the gut, here are more websites:

http://nourishedkitchen.com/water-kefir/ 

http://www.culturesforhealth.com/water-kefir-frequently-asked-questions-faq

http://earthfriendlygoodies.com/27/my-water-kefir-recipe-a-fermentation-experiment
 
 http://www.youtube.com/watch?v=Owzu_ngYOZw


Probiotics even help with oral health! 
Prehistoric Man Had Much Healthier Teeth and Gums than Modern Humans
http://www.washingtonsblog.com/2013/02/the-real-source-of-cavities-and-gum-disease.html


Here is a Ted Talk about the importance of healthy bacteria in our bodies:

TED Talk video:  Bonnie Bassler: How bacteria "talk" 
http://www.ted.com/talks/bonnie_bassler_on_how_bacteria_communicate.html


If you have any questions, please, just ask, I'd love to hear from you. And, tell me, what are your experiences with making fermented drinks?


12.09.2012

A Natural Look For The Holidays


 I love a natural look for the Holidays - fragrant pine branches, antlers, silver ornaments, white flowers and of course white candles, lots of white candles. This year, I made scented candles out of wine bottles. A fun project and not too expensive, see the how-to instructions below.


 Such a lovely warm glow....


I searched the internet, watching videos about how to safely cut bottles, and  settled on Ephrem's Original Bottle Cutter Kit available on Amazon.com.


Lots of wine bottles collected waiting to be put to good use.....


I found wicks at Michael's Art Supply Store using double-sided pressure sensitive tape to secure them to the inside of the bottle.


Soy wax has a nice creamy natural look, so I decided to go with it and found a 10 pound bag on the internet. Shipping costs were more than the price of the wax (!), but the total price was still less than what I would have paid locally. 


Removing the labels proved to be somewhat difficult - soaking in hot water really did nothing. So, using a straight-edged razor, I carefully shaved off the label. Then I used Goo-Gone to remove the glue leaving a perfectly clean bottle.


Cut and prepared bottle bottoms with wicks waiting to be filled with soy wax. 


Make sure to use a double boiler for melting the wax, and watch it carefully to avoid fires. 


Also, be sure to center the wick tops while they harden, so that you avoid what happened here! I will just put the glass container back in hot water to melt the wax and recenter the wick.


And violĂ ! Pretty candles made with something people usually throw away.


Wishing you and yours a wonderful holiday season filled with light, laughter & much love!  


What are you making for your holiday decorations? I'd love to hear about them in the comments box below, thanks!


9.15.2012

Savoring The End of Summer

Ah....summer will be ending soon. The shadows grow longer, the air becomes somewhat chilly and  the harvest is resplendent with plentiful tomatoes and zucchini. Always a great combination, I decided to turn them into a delicious tart, which I served for a summer dinner. The recipe follows below.

Tomato and Zucchini Tart with herbs.
Closeup of the tart.

 Below is the recipe I used for the Zucchini Tart. To save on cooking time, I grilled the zucchini first. The results were very delicious, if I do say so myself!
 

Tomato-Zucchini Tart
By Julia Rutland, Birmingham, Alabama, Southern Living
AUGUST 2007


    Piecrust –either gluten free or regular  ( I used cornmeal crust)
    1 medium zucchini, thinly sliced (about 3/4 lb.)
    (I used 2 and grilled them)
    2 teaspoons olive oil
    3 medium plum tomatoes, sliced
    1/2 cup fresh basil, chopped
    1/3 cup (1 1/2 oz.) freshly grated Parmesan cheese
    1/3 cup light mayonnaise  ( I omitted this)
    1/2 teaspoon freshly ground pepper

Preparation

    1. Fit piecrust into a 9-inch tart pan according to package directions; trim excess. Prick bottom and sides of piecrust using a fork.
    2. Bake piecrust at 450° for 9 to 11 minutes or until lightly browned. Let cool.
    3. SautĂ© zucchini in hot oil in a large skillet over medium-high heat 2 minutes or until tender. Arrange zucchini in bottom of prepared piecrust. Arrange tomatoes on top of zucchini.
    4. Stir together basil, cheese, and mayonnaise. Drop by teaspoonfuls evenly on top of tomatoes, and spread gently. Sprinkle with pepper.
    5. Bake at 425° for 10 to 15 minutes or until thoroughly heated and cheese mixture is slightly melted.


 These items came from thrift shops. I like to use quilts as pretty tablecloths. The yellow one above was so sunny, cheery and French looking that it inspired the whole posting!


Closeup of the sunflowers - always a great summer flower.

Again, Tomato and Zucchini tart. What a wonderful way to savor the end of summer!


So, how was your summer? Tell me what tasty dishes you have made this season in the comments below, I would love to hear from you.


8.30.2012

Fig and Walnut Tart!!!


Figs are in season right now, luscious and ripe! Get'em quick because, blink once, and the season will be over. I recently made a Fig and Walnut Tart that was very delicious. The recipe I used was from The Tuscan Sun Cookbook: Recipes From Our Italian Kitchen by Frances Mayes and Edward Mayes.


Closeup shot of thyme and purple flowers.
Another closeup shot of figs, lavender and thyme plants.


The items above were from thrift stores.
The large Willams-Sonoma linen tablecloth and twig placemats were also from thrift stores.


Fig and Walnut Tart


From The Tuscan Sun Cookbook: Recipes From Our Italian Kitchen by Frances Mayes and Edward Mayes

Serves 10

Pasta Frolla

10 Large fresh figs, halved
Extra-virgin olive oil for the baking sheet
6 Tablespoons Honey (Jasmine or Lavender, if available)
5 Tablespoons sugar
1 cup walnut halves, toasted and halved again
1/2 cup heavy cream
2 Tablespoons all-purpose flour
1/2 teaspoon fresh thyme leaves or 1/8 teaspoon dried


Preheat the oven to 375° F

Place the pastry in a 10-12 inch pie plate, trim the edges, pierce it all around with fork tines, and pre-bake for 5 minutes. Remove from the oven and set aside.

Raise the oven control to broil. Line a baking sheet with parchment paper and oil the paper. Arrange the figs on the paper and drizzle 2 tablespoons of honey and 2 tablespoons of sugar over them. Broil 2-4 minutes. Let the figs sizzle a moment, slightly caramelizing them. Don’t let the sugar brown, just melt. Remove them from the oven and turn down the oven temperature to 350°F.

In a small pan over medium-low heat, melt 1 tablespoon of sugar. Add the walnuts and toss just to coat them, about 1 minute. Take care: sugar can so easily turn rock hard, Remove the walnuts to a plate to cool.

Place the figs cut side up in the piecrust and arrange the nuts evenly over them. In a small bowl, mix well the cream, remaining 1/4 cup honey, the flour, thyme, and remaining 2 tablespoons sugar. Spoon evenly over the figs. Bake 25 minutes, or until the crust is golden and the filling is warmly browned.


After taking this shot, my friends and I devoured the Fig and Walnut Tart - Delicious!